Frame Member Data - Canopy
Beam with Inset Girt
(Revised: 06/04/08)
1)
Adjust
Canopy Beam Length
|
View A
View B |
If possible,
designer should design the canopy beam bolting plate to have a flush
condition at the FO (flange outside).
Before changing the connection get approval
from the designer! 1)
Confirm
any changes design will require for the top of canopy beam bolting plate to
be flush with the FO. Possible changes may include: ·
Bolting
plate material change ·
Different
weld sizes or type ·
Change
to bolt size or quantity 2)
Adjust
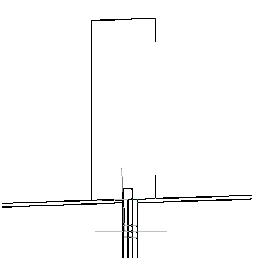
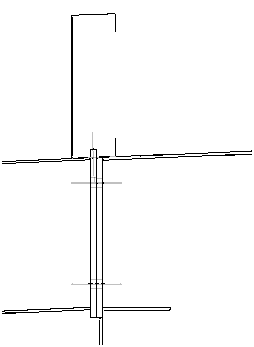
canopy beam length using Geometry Tool so bolting plates meet correctly. ·
The
bolting plates overlap into each other in View A ·
View B shows plates properly
aligned |
2)
Change
Canopy Beam Cut in Plate to a Flush Condition at the FO
|
1)
Go
to Frames/Member Data/file name/Wall
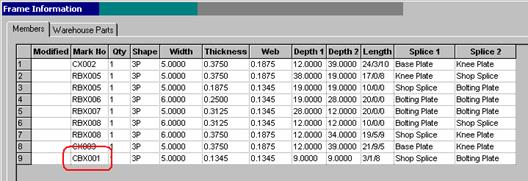
x/frame location - double click to open Frame Information 2)
Select
the canopy beam CBXxxx then pick the Properties button
|
|
|
3)
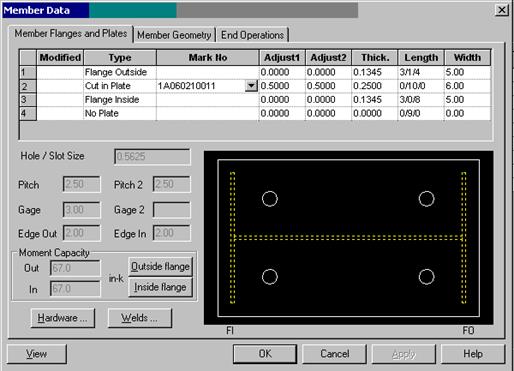
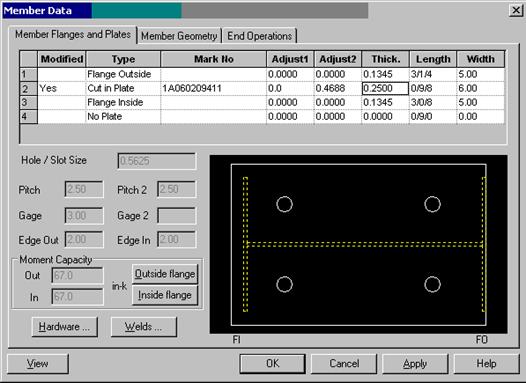
The
element to be modified is the Cut in Plate 4)
The
plate in the example has a ½” cantilever past the FO and the FI.
|
|
|
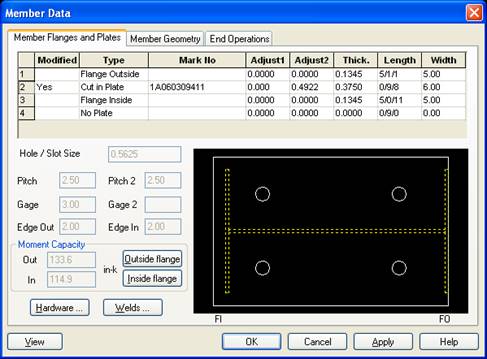
5)
To
bring the Cut in Plate flush with the FO, change the Adjust 1 dimension to 0.000. 6)
The
part length will also need to change by the same amount. In this example the
plate was 10” (0/10/0). It needs to be changed to 9 ½”
(0/9/8). Once data has been entered hit the Apply button, the plate becomes
flush with the FO. a.
If
the Cut in Plate length is not changed the plate will cantilever further past
the FI. b.
go
into the welds and change the weld at the FO from Fillet to CJP Full Pen and
add a note for the shop to “grind smooth”. 7)
Hit
Okay or Apply until you are back to the model view to accept and save the
changes.
|
|
|
|
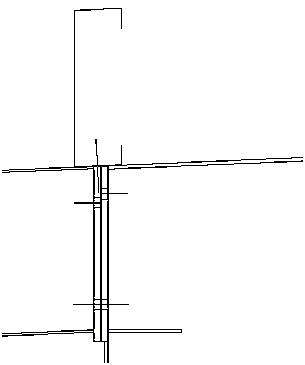
8)
Connection
should now look similar to example at left. 9)
Notice
holes do not align, now the canopy beam Cut in Plate holes need to be
modified. 10)
Go
to - Frames/Member Data/file name/Wall
x/frame location 11)
Select
the canopy beam and hit the Properties… button. 12)
Select
the Cut in Plate line. |
|
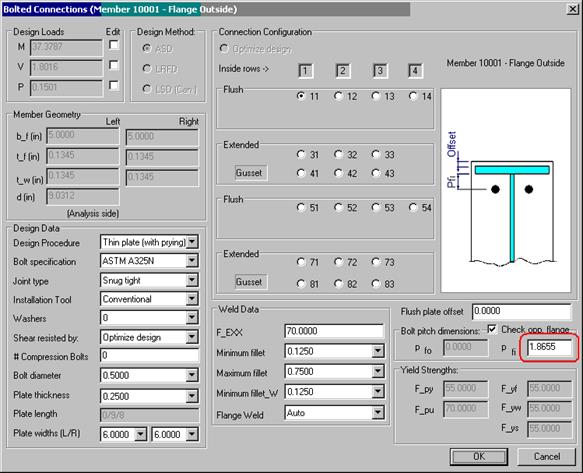
13)
Select
the Outside Flange Button. This will open the Bolted Connections screen.
14)
The
pfi dimension will need to be adjusted. a.
The
original plate had holes 2” from the edge. The hole is still being
located 2” from the edge.
(You can determine this by adding the flange thickness to the pfi
dimension.) b.
The
½” that was deducted for the cantilever past the FO must also be
removed from the pfi distance. 15)
If
the plate size (thickness or width) or bolt diameter needs to be changed it
can be done on this screen in the Design Data section. Hit Okay. 16)
If
a standard plate was being used it will be replaced by a user plate after
these changes are made. a.
This
example started with plate 1A060310011 but has been replaced with
008SP060030094.
17)
Select
Okay 2 more times to get back to
model. The holes should now be aligned.
|
|
3)
Create an
Eave Strut Attachment Plate
|
1)
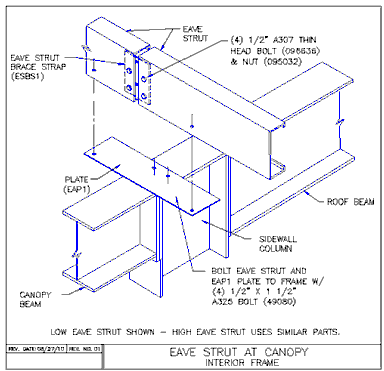
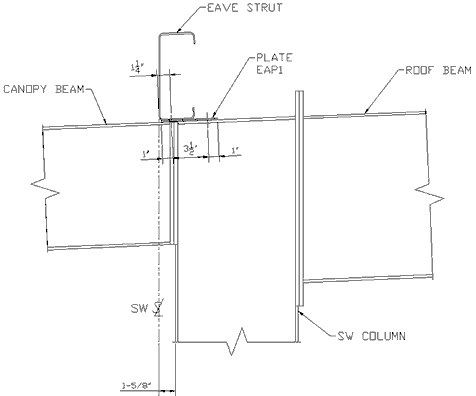
If
the standard plate EAP1 can be used: a.
Add
to a Vision warehouse or increase the quantity on the Final Build
Notification form b.
Add
the additional bolts to the warehouse. Do not forget the shims if a steeper
slope. c.
Add
a detail similar to one shown below to the Roof Secondary SED sheet
|
|
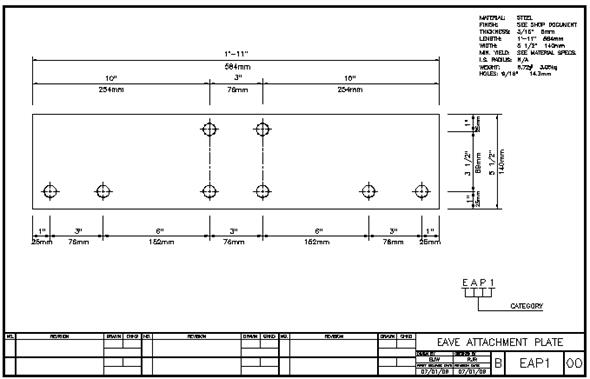
2)
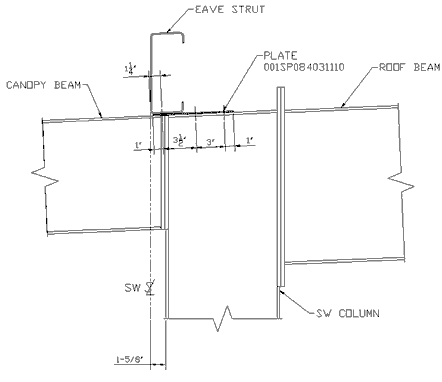
If
additional bolts are required as would happen with a strutted connection, a user
plate will need to be created in Vision under User Clips. a.
Layout
plate configuration and input under User Clips b.
You
must use a material thickness available in User Clips. Check with design for
minimum allowable thickness. c.
Create
Exception Drawing for the plate. See below.
d.
If
there is already a strutted connection such as RS12PE at the location, no
additional bolts will need to be added. Do not forget the shims if a steeper
slope. e.
Add
a detail similar to one shown below to the Roof Secondary SED sheet
|
4)
Punch
Frame for Eave Strut Attachment Plate
|
1)
Go
to Frames/Data/shape name/wall number/ and select frame to add
punching to the FO of the rafter. 2)
A
condition that would be non-strutted similar to RS12PA can use plate EAP1.
The punching should be located as shown below.
|
|
3)
A
condition that would be strutted similar to RS12PE will need a user plate.
Locate the punching as shown below or as the connection requires.
|
5)
Add
Punching to Eave Strut if Needed
|
1)
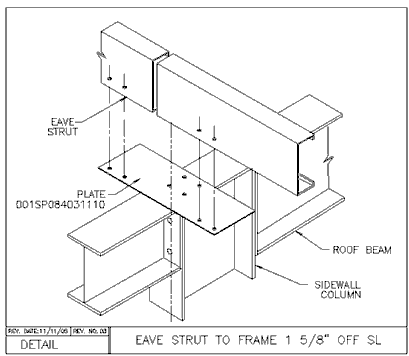
The
eave strut may require additional holes for the offset condition created by
the eave strut attachment plate. First verify if the holes needed are already
on part in the Holes/Subunits tab under the Properties section of the eave
strut. A hole code of 1, 2 or 7 may already be at the required location and
can be used. 2)
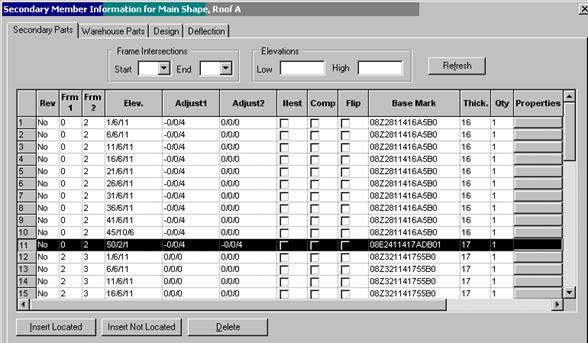
If
hole code is not at needed location go to Secondary/Member Data/shape name/Roof Surface/ select
the eave strut and select and open the Properties button then add holes.
|
